DIY Rain Gauge for Kids
Science experiments and specimen tubes seem to go hand in hand so when I was thinking up this diy rain gauge weather activity for kids I decided they’d be a perfect fit. We used plastic tubes that have cork stoppers, but any specimen tubes will do for this diy rain gauge activity. This also works as a diy snow gauge so if you’re getting more snow than rain this time of year grab your gloves and head outside!

Supplies:
- 4 Specimen tubes
- 1 Dry erase marker
- Ruler
Activity
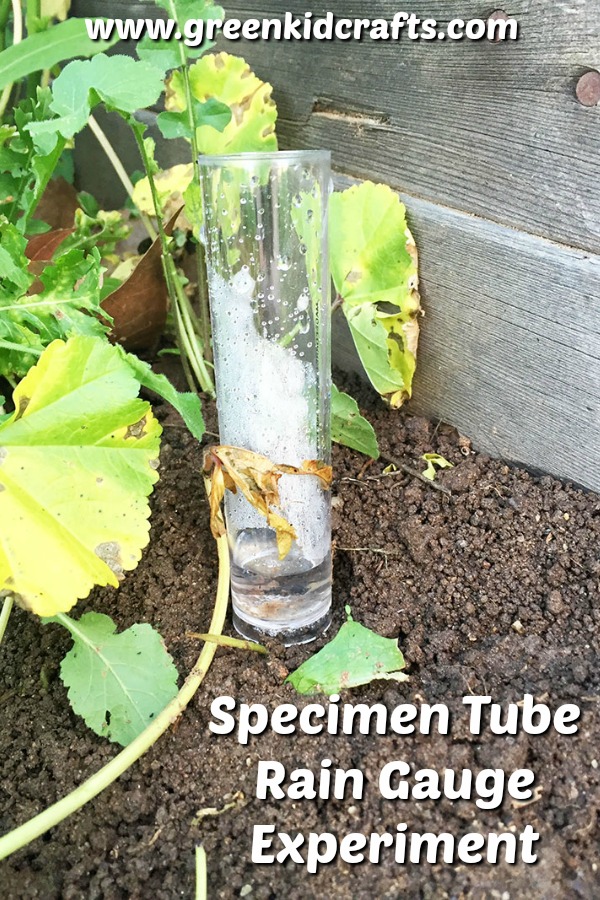
Remove the stoppers from the specimen tubes and take the tubes outside. Place them in different areas of the yard before it is due to rain. Try to find spots that may collect rain different from each other. We put one diy rain gauge on a stump at an angle, one on a mound of dirt near a wooden wall, one out in the open in the grass and another slightly under the overhang of the house.

Next head inside to make predictions on which areas will collect the most rain, or if all tubes will collect equal amounts of rain. Research rain and what may affect rainfall and how much rain will be collected in the tubes. Variables include barriers such as trees and walls, and wind. Rain doesn’t fall straight down when the wind blows so tubes may collect more, or less rain depending on their location in the yard.
Measure the Rainfall
When the rain has stopped (or you’re just ready to continue with the activity) go outside and collect the specimen tubes from your yard. Place them on a flat surface and use a dry erase marker to mark the level of liquid in the tube. Next, use a ruler to compare the amount of rain in each tube.


Questions to ask when observing the amount of rain in each tube:
- Which specimen tube has the most rain?
- Which tube has the least amount of rain?
- How did the location of the tubes effect the amount of rain that collected in each tube?

Follow us on Instagram for more amazing activities for the kids!