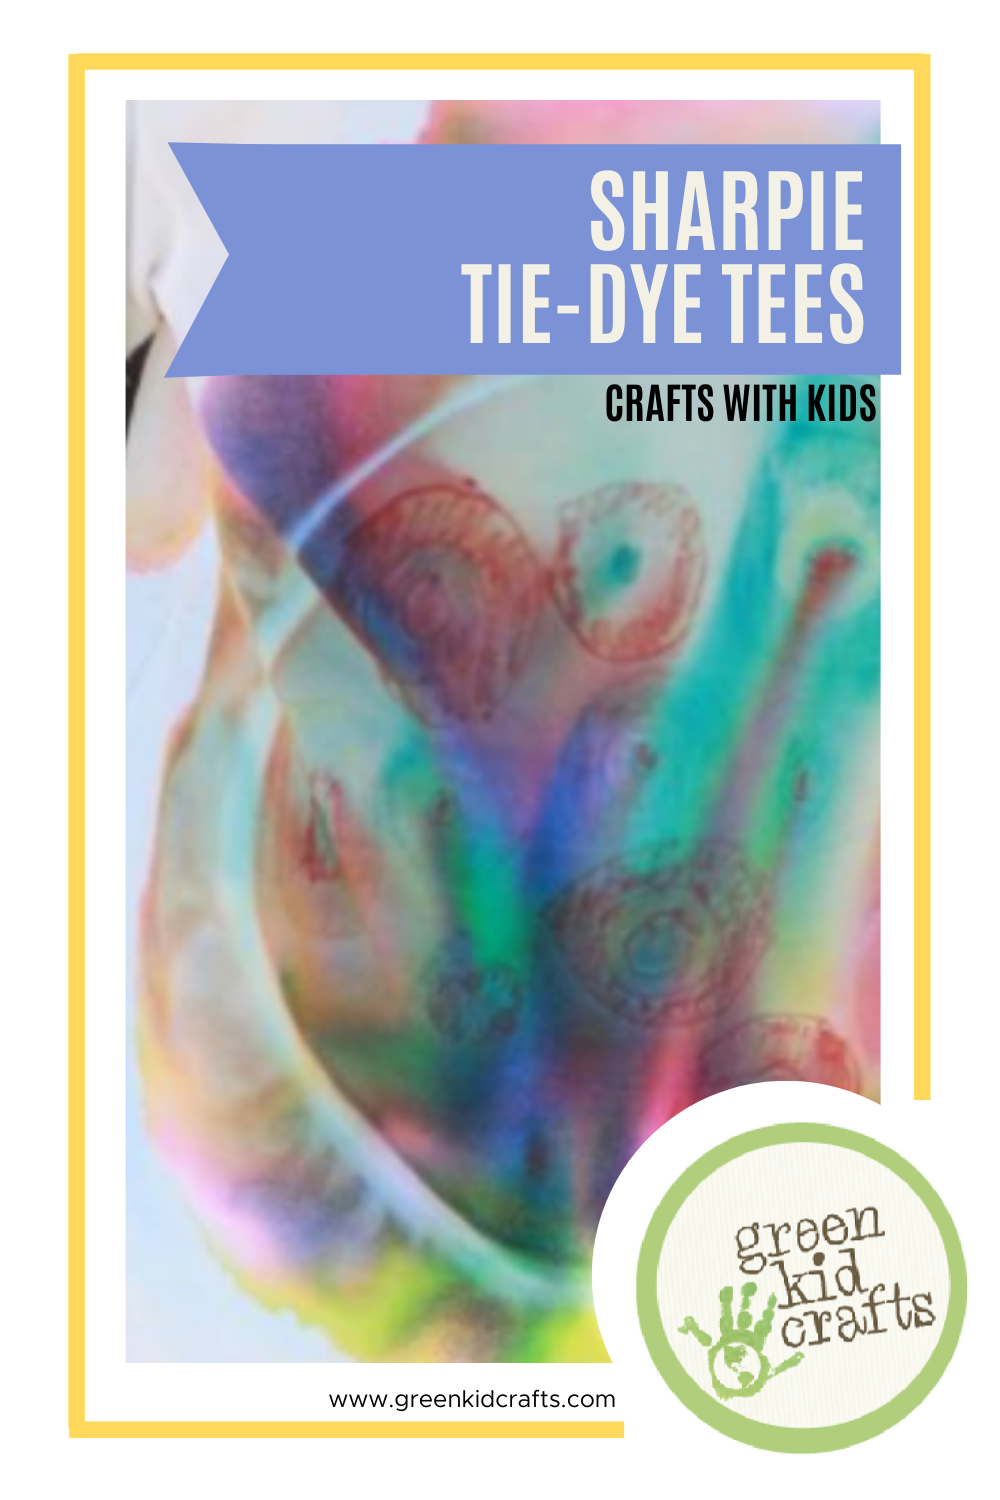
Sharpie Tie Dye Shirts
One of our favorite art activities is tie dye – it is fun to use different colors, color in different designs and wonder what the end result will look like. This was our first time using Sharpie markers and we were excited to see the way the colors continued to mix to make a range of different colors.
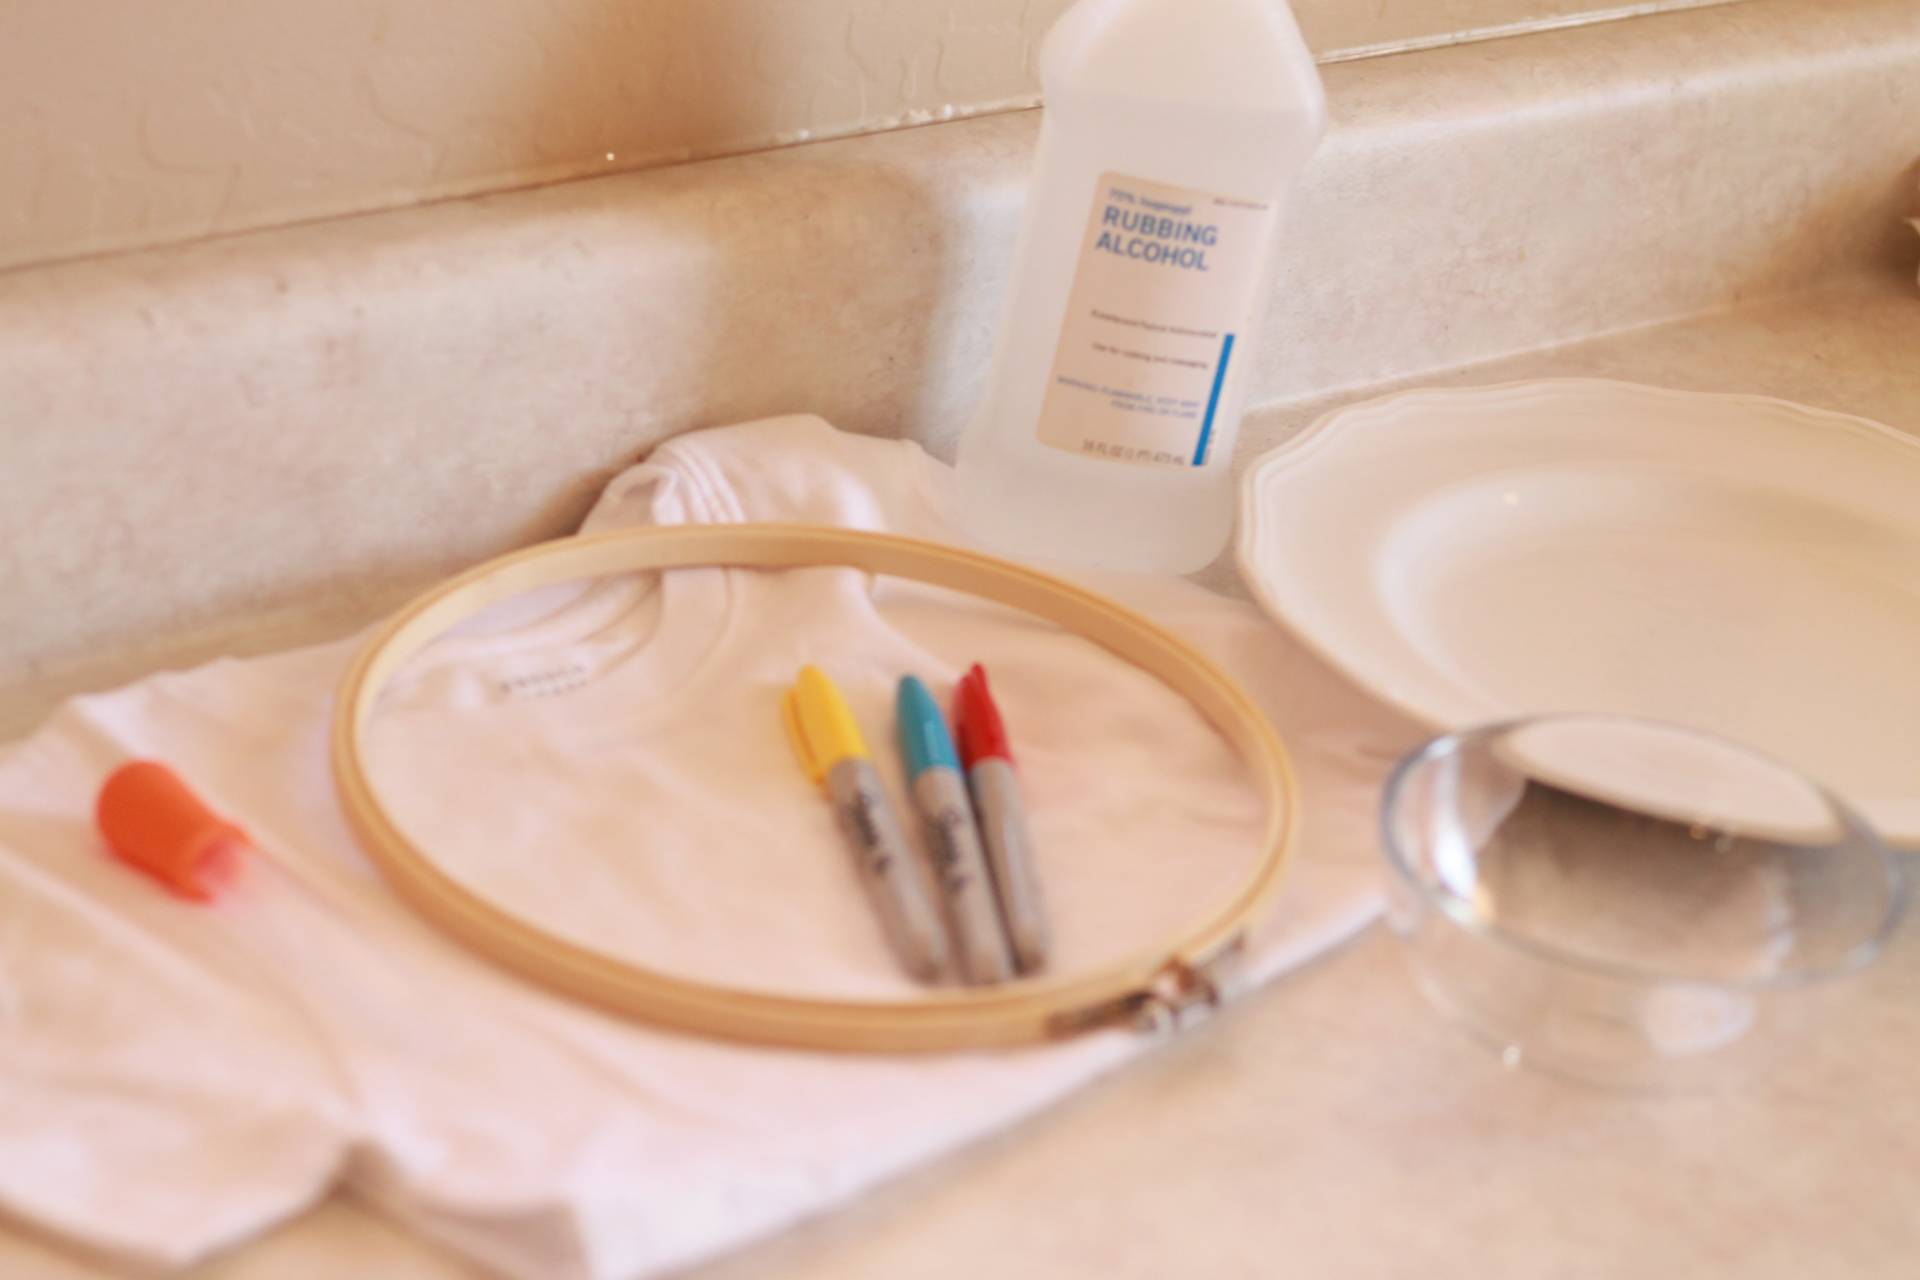
Supplies
- Sharpie markers in Blue (light blue), Red, and Yellow. Dark blue doesn’t mix well with other colors.
- Plain white T-shirts or T-shirt fabric
- Large Embroidery Hoop (10-inch)
- Eye Droppers
- Plate
- Small Bowl
- 70% Isopropyl Rubbing Alcohol
- Retayne (optional for making it colorfast)
Instructions
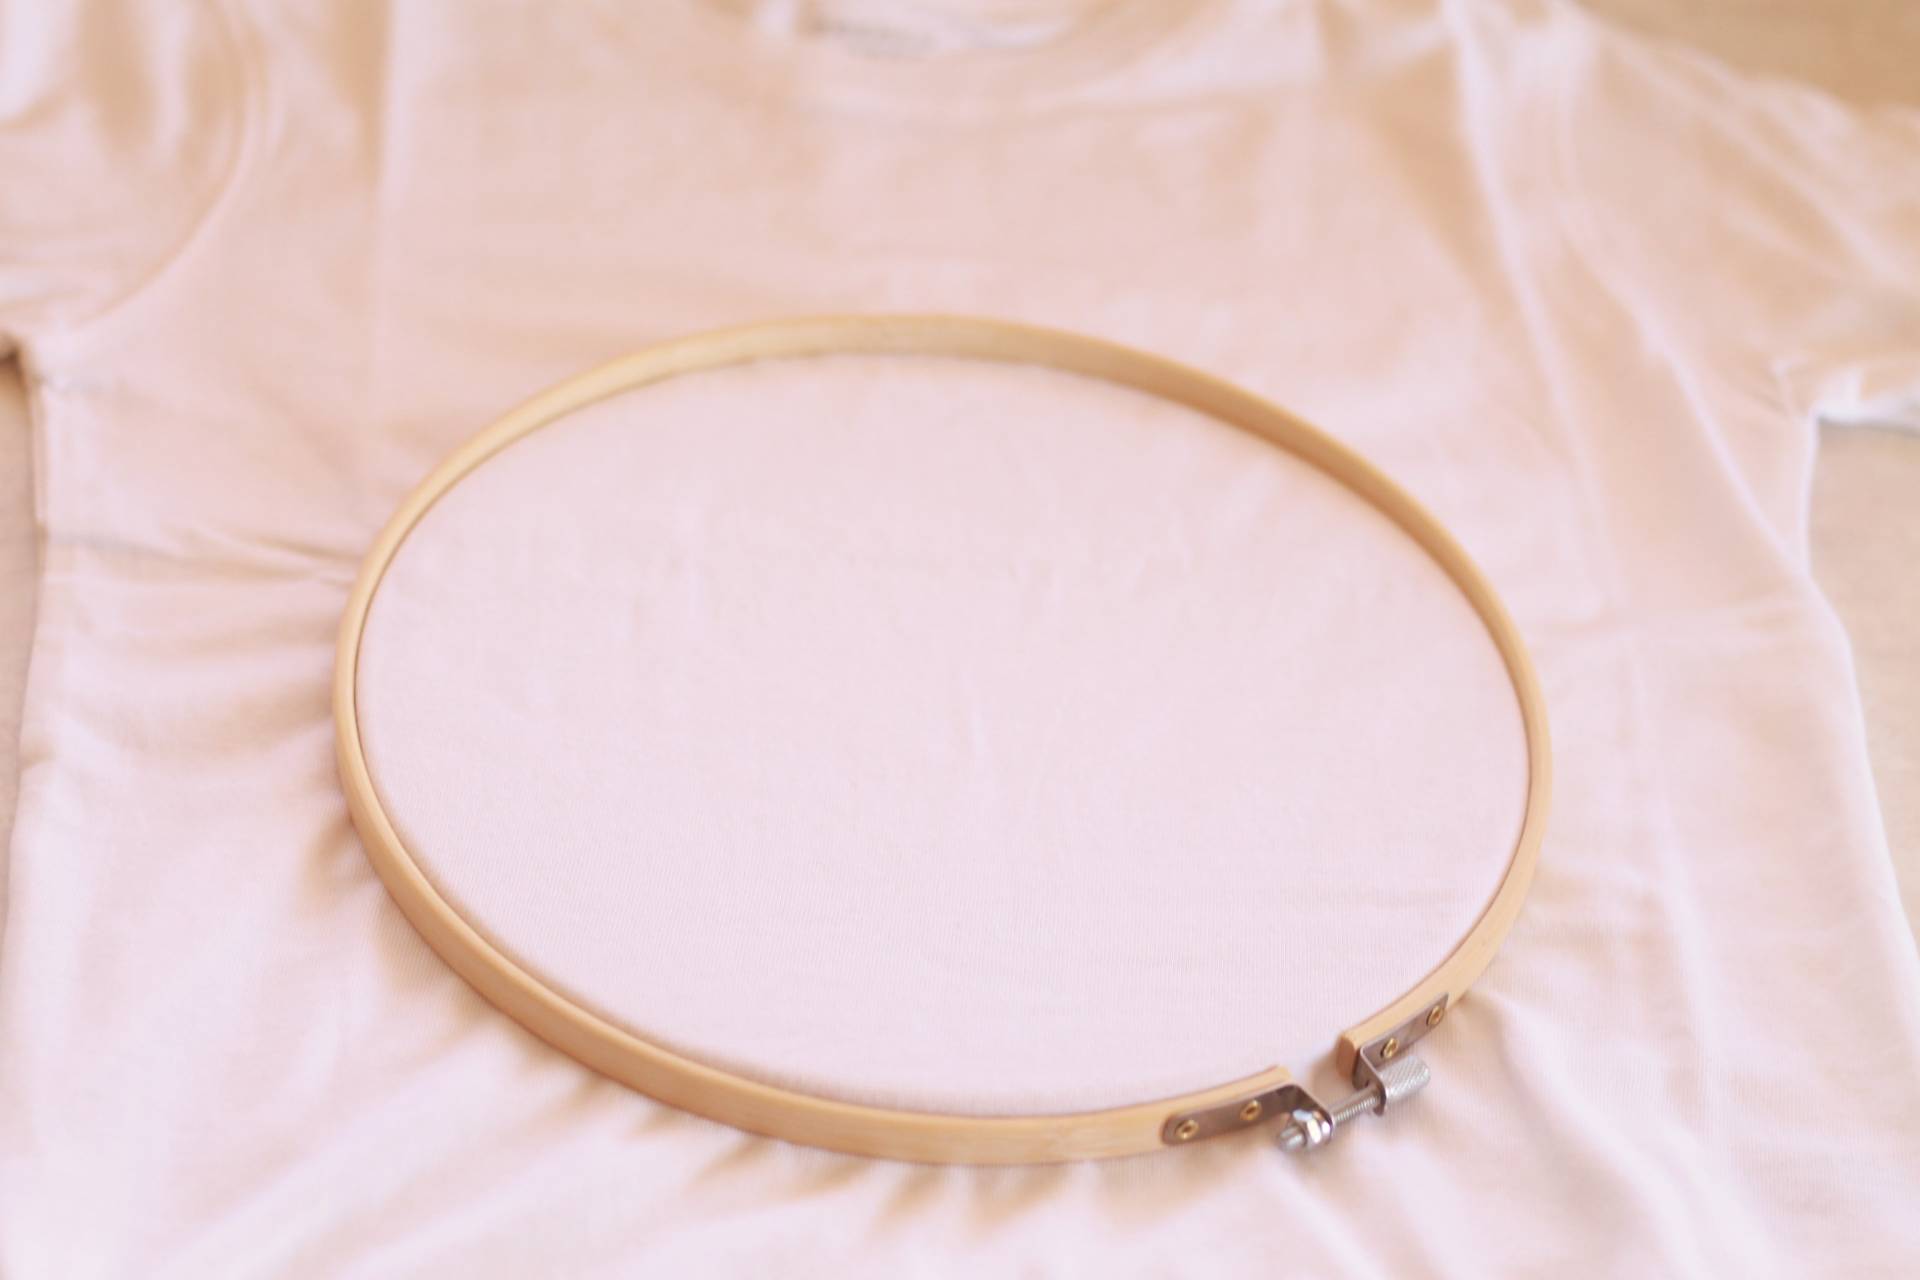
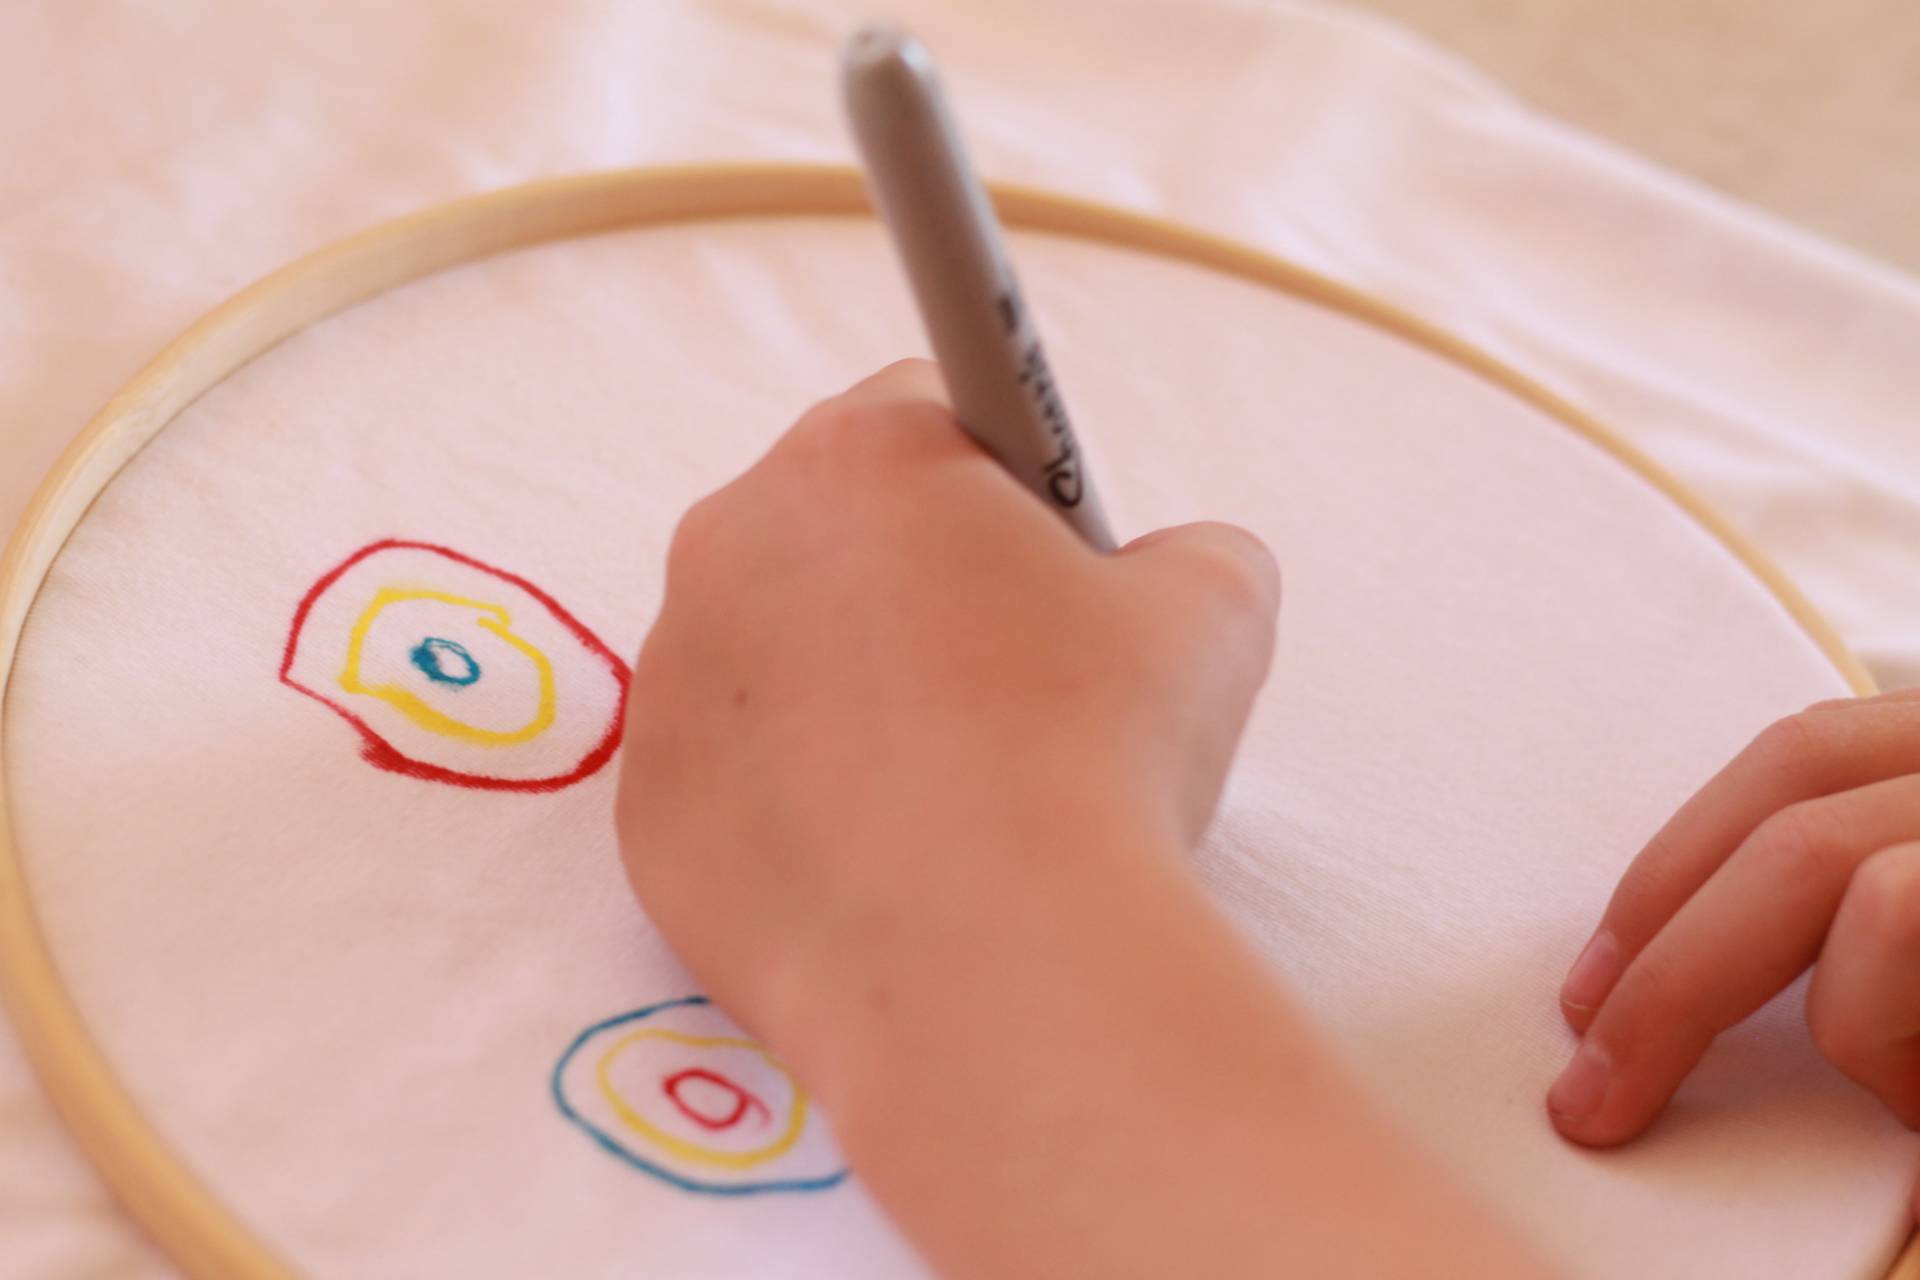
Use the embroidery hoop to tighten a section of fabric at the front of the shirt.
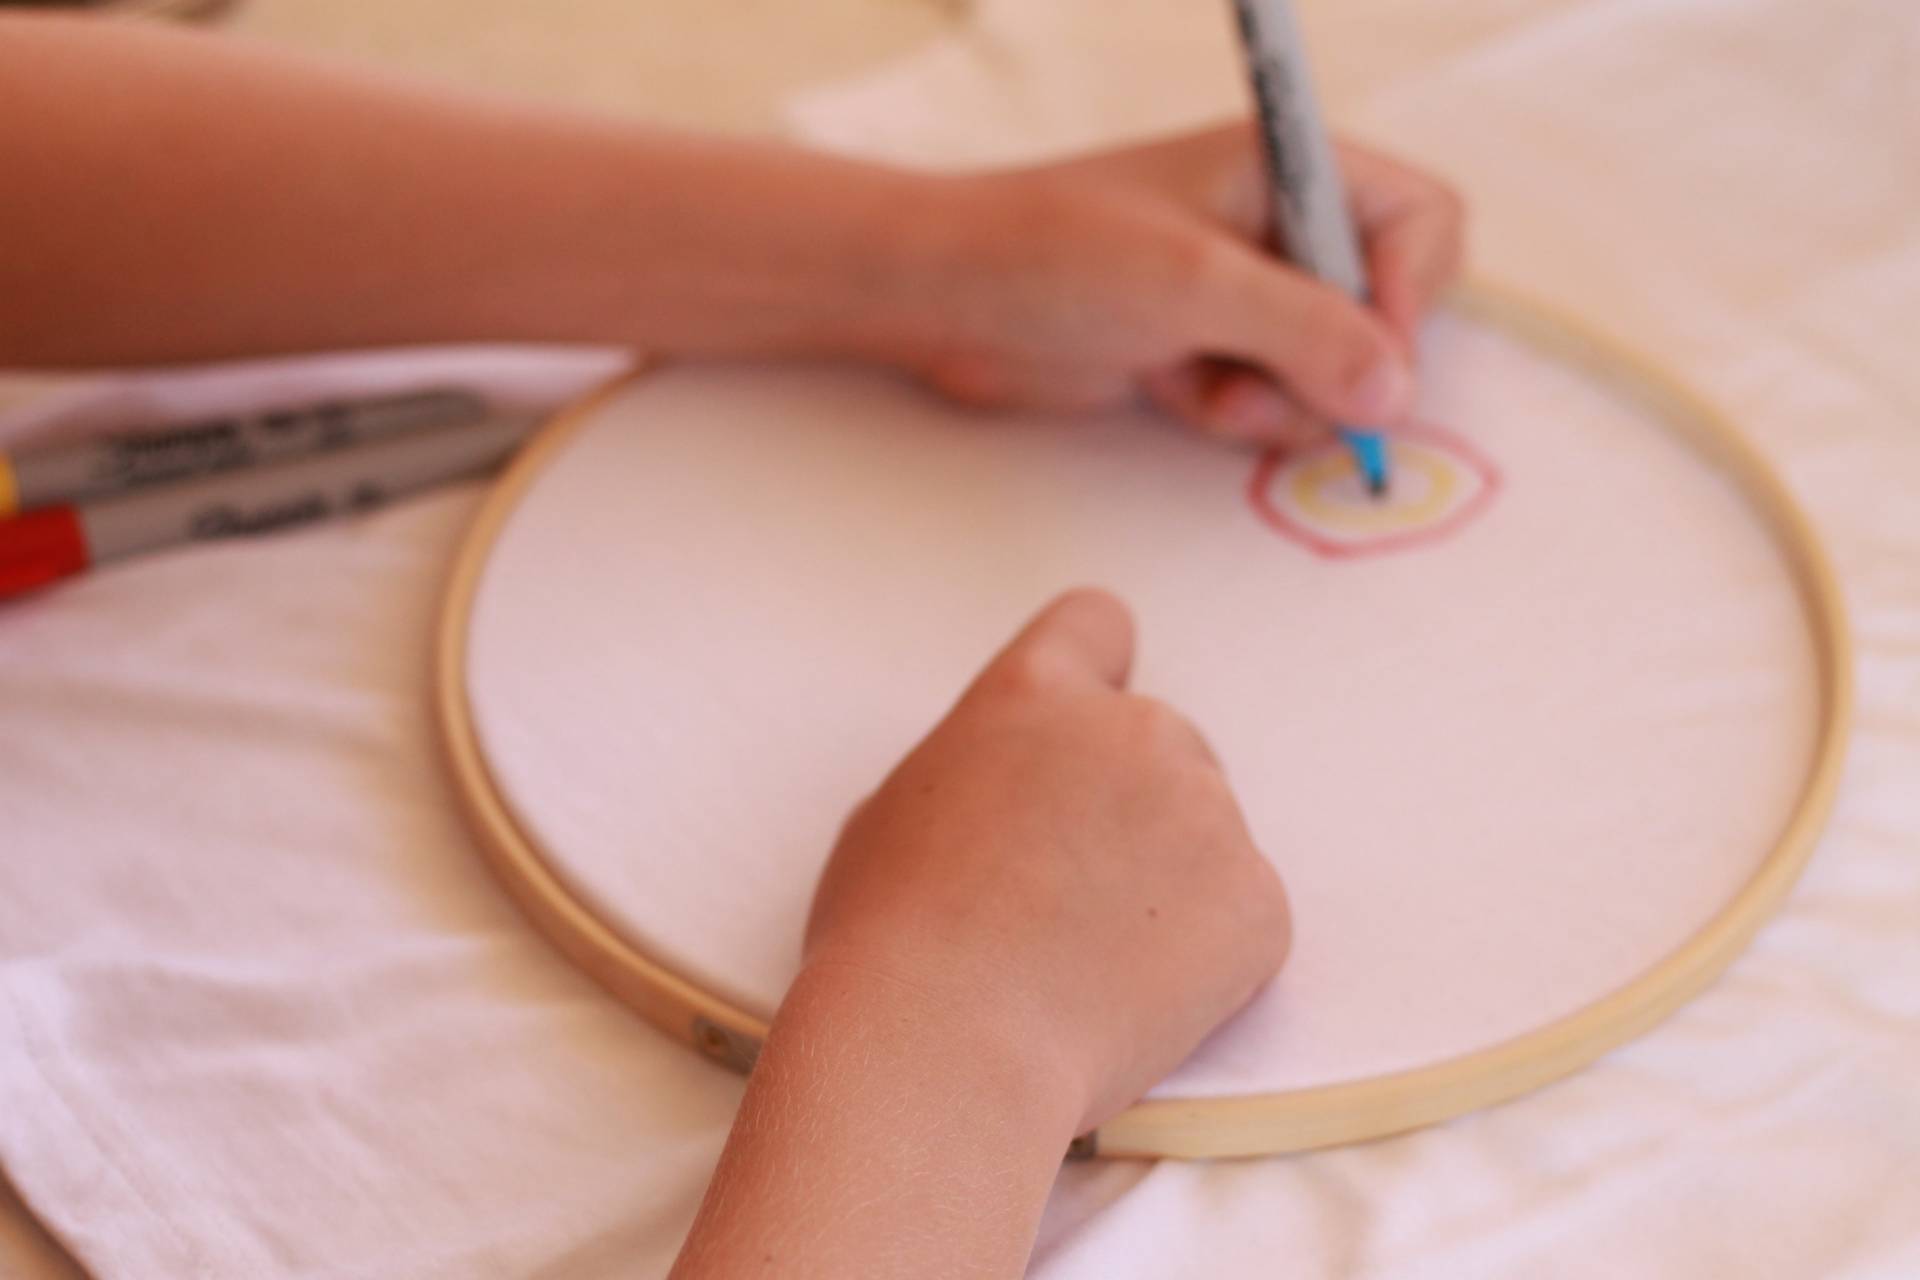
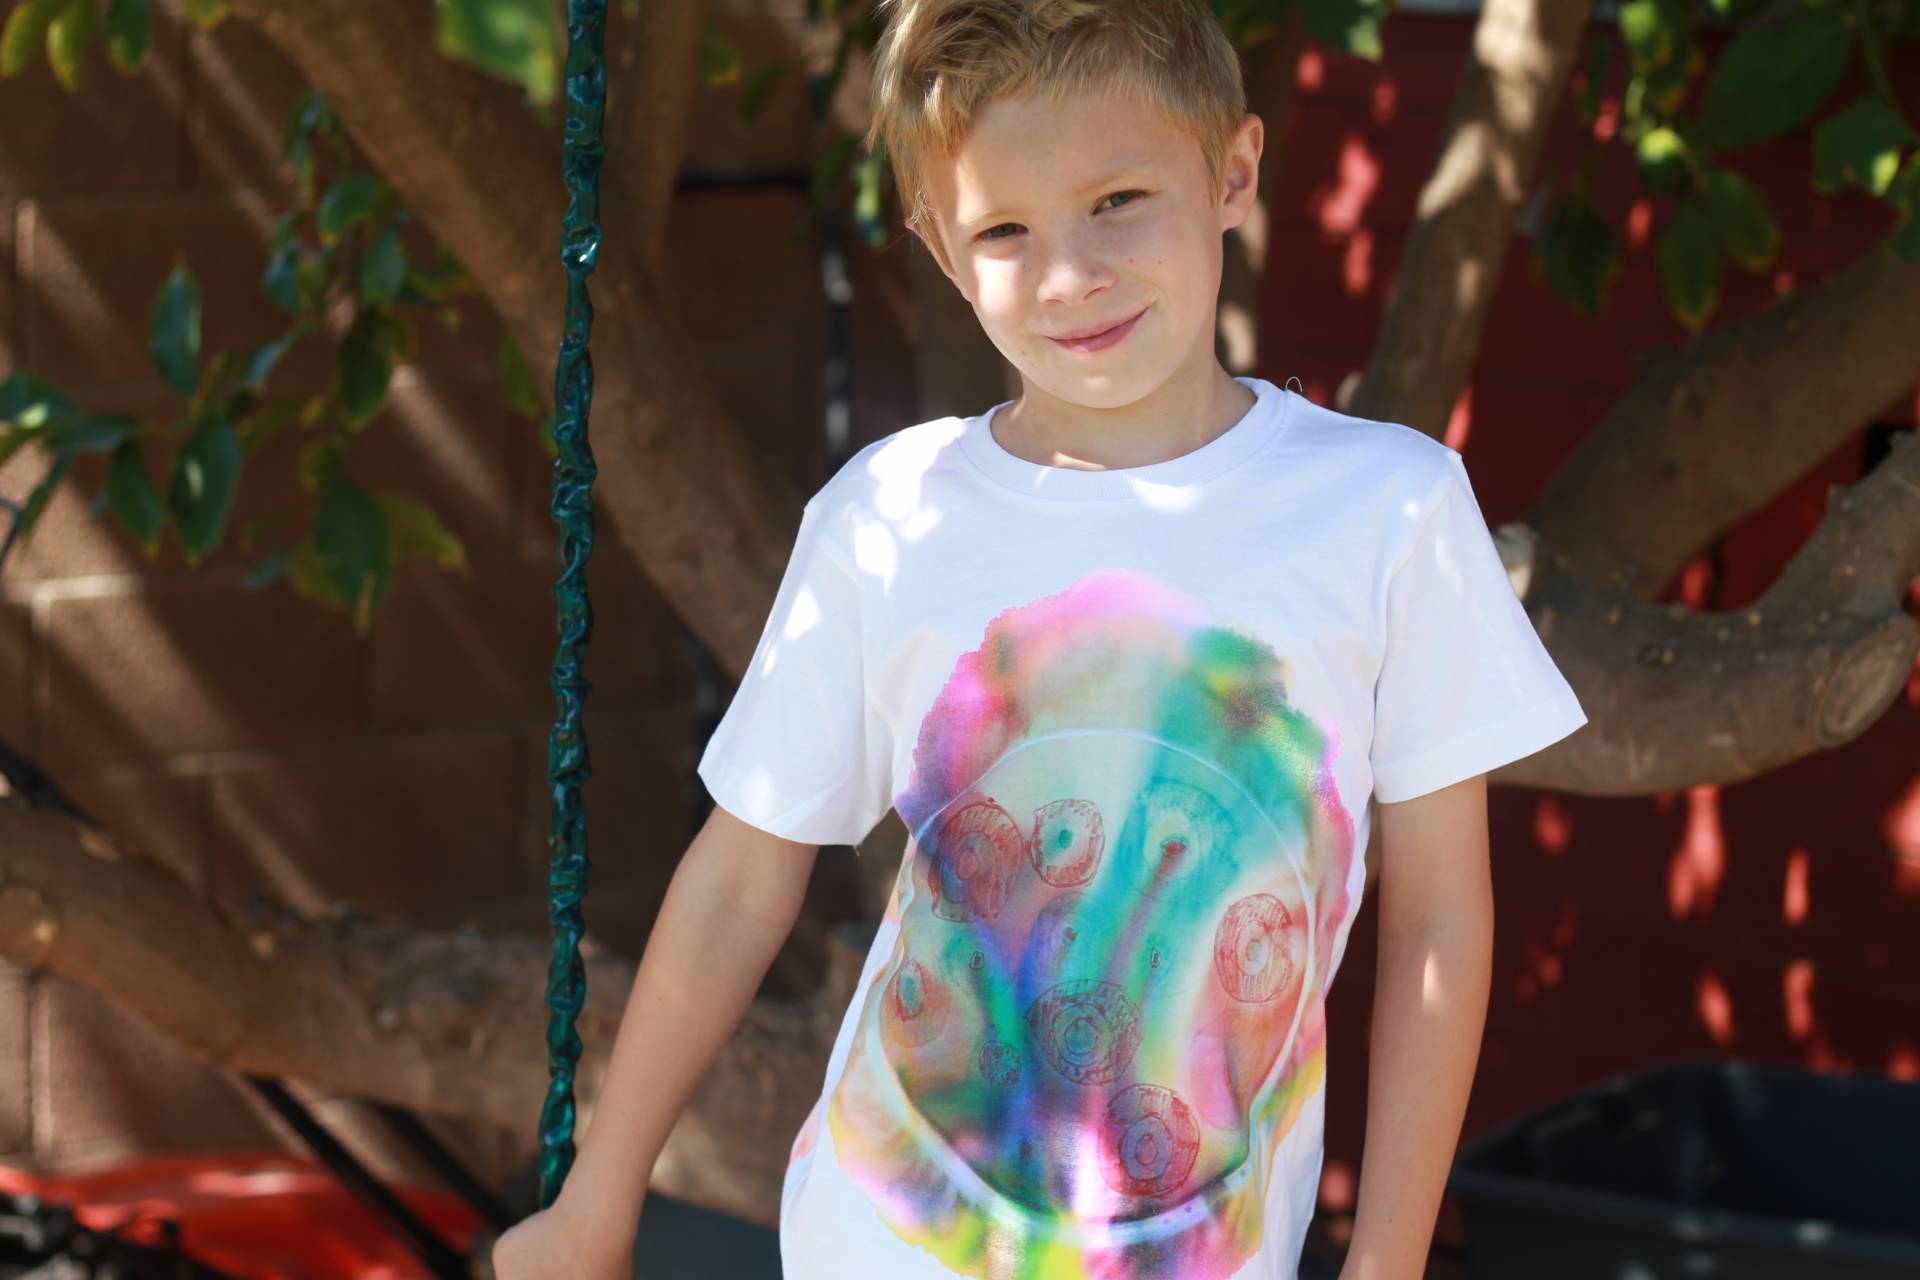
Use your red, yellow and light blue Sharpies to draw all over the shirt. Add a good layer of color. For the best color mixing demonstration you can use bulls-eye designs with alternating red, yellow and blue circles.
When the design is complete, slip a plate inside the shirt under the embroidery hoop to catch any rubbing alcohol that may seep through.
Pour rubbing alcohol into a small bowl. Using an eye dropper, begin dropping rubbing alcohol on the t-shirt. If you have bulls-eye designs, drop the alcohol in the center of each bulls-eye. Within seconds you will see more colors appear! Green, orange and purple should be visible as the ink bleeds and mixes with the other colors.
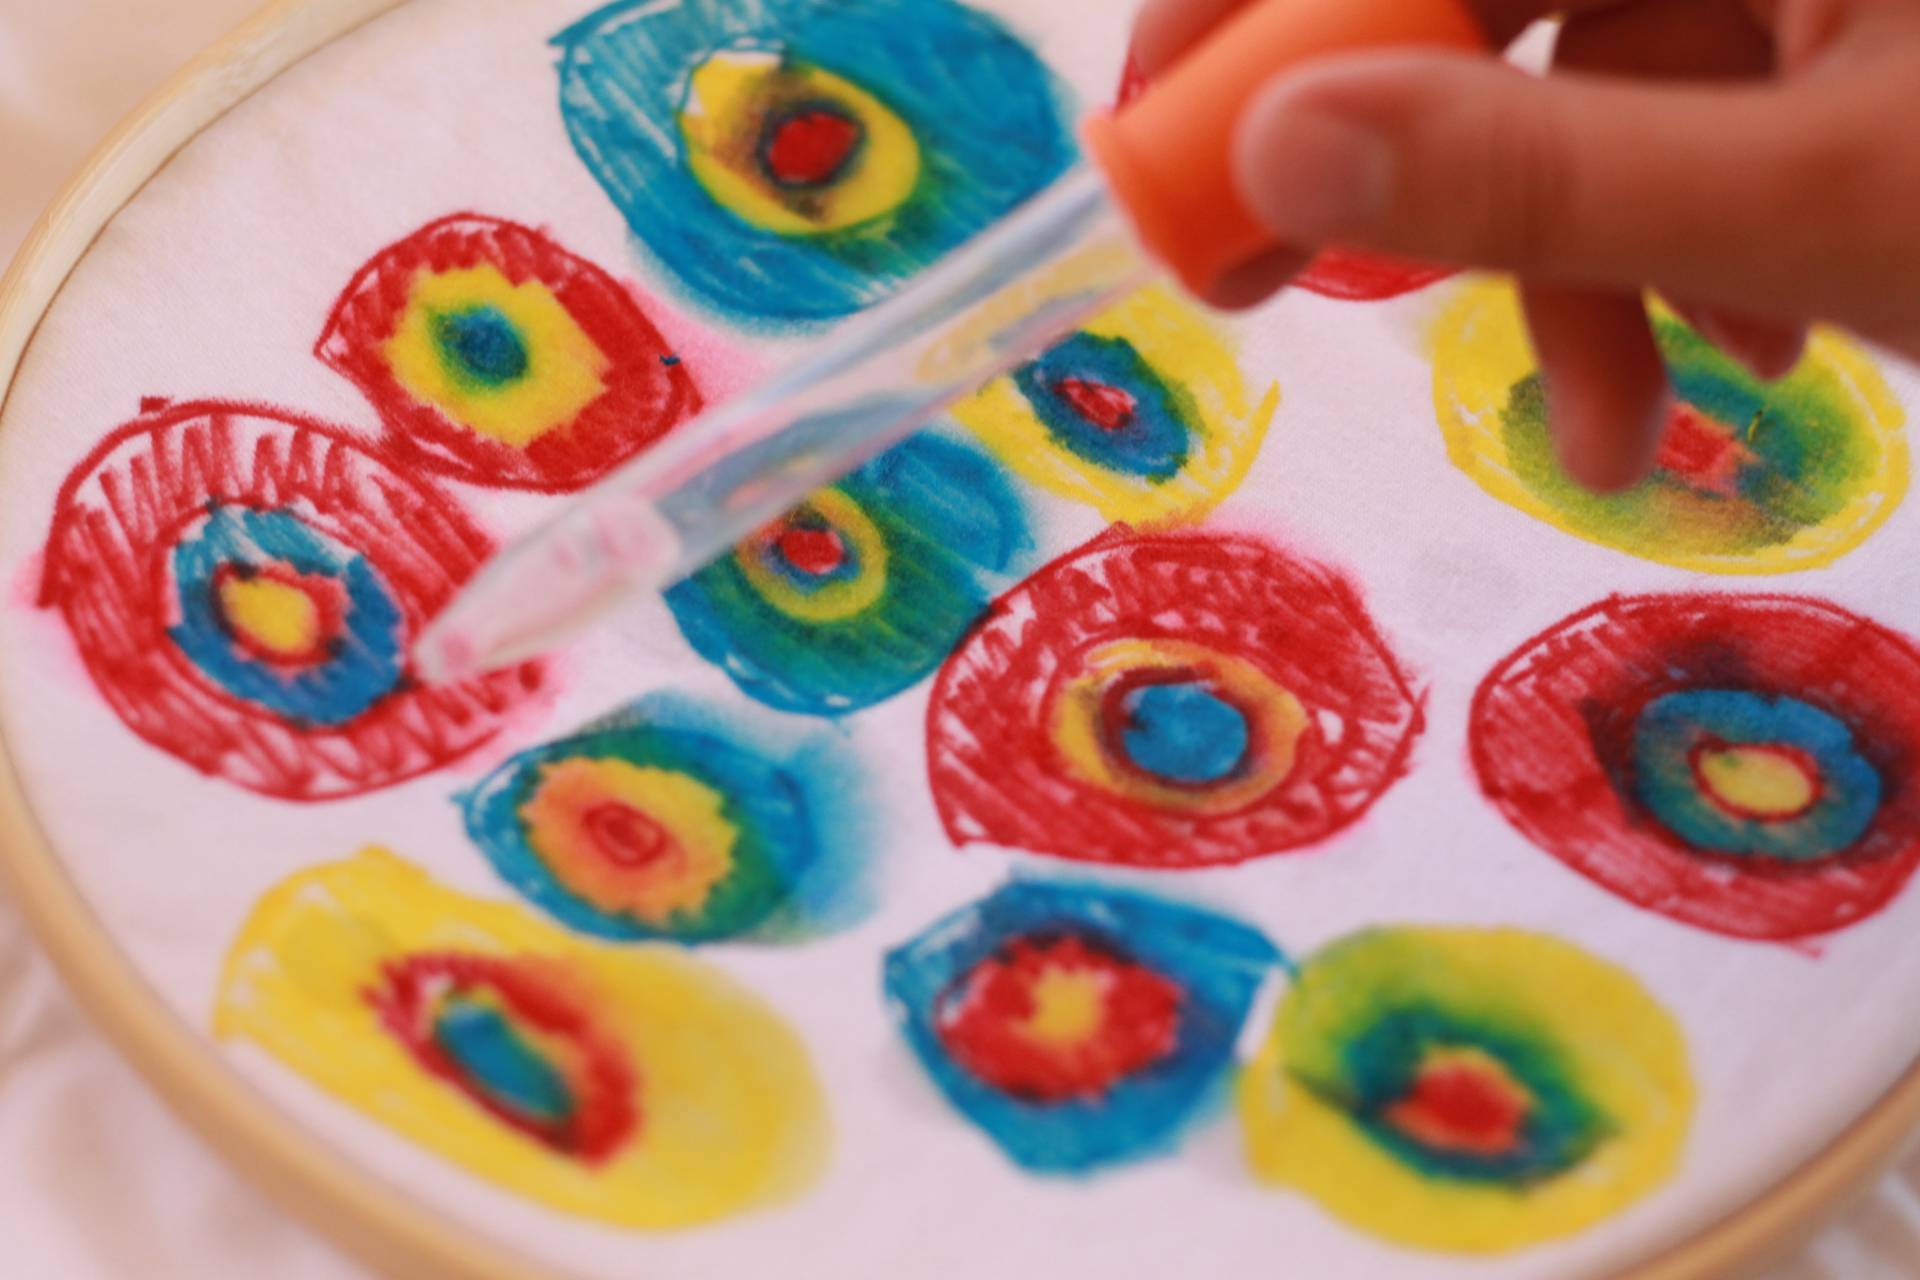
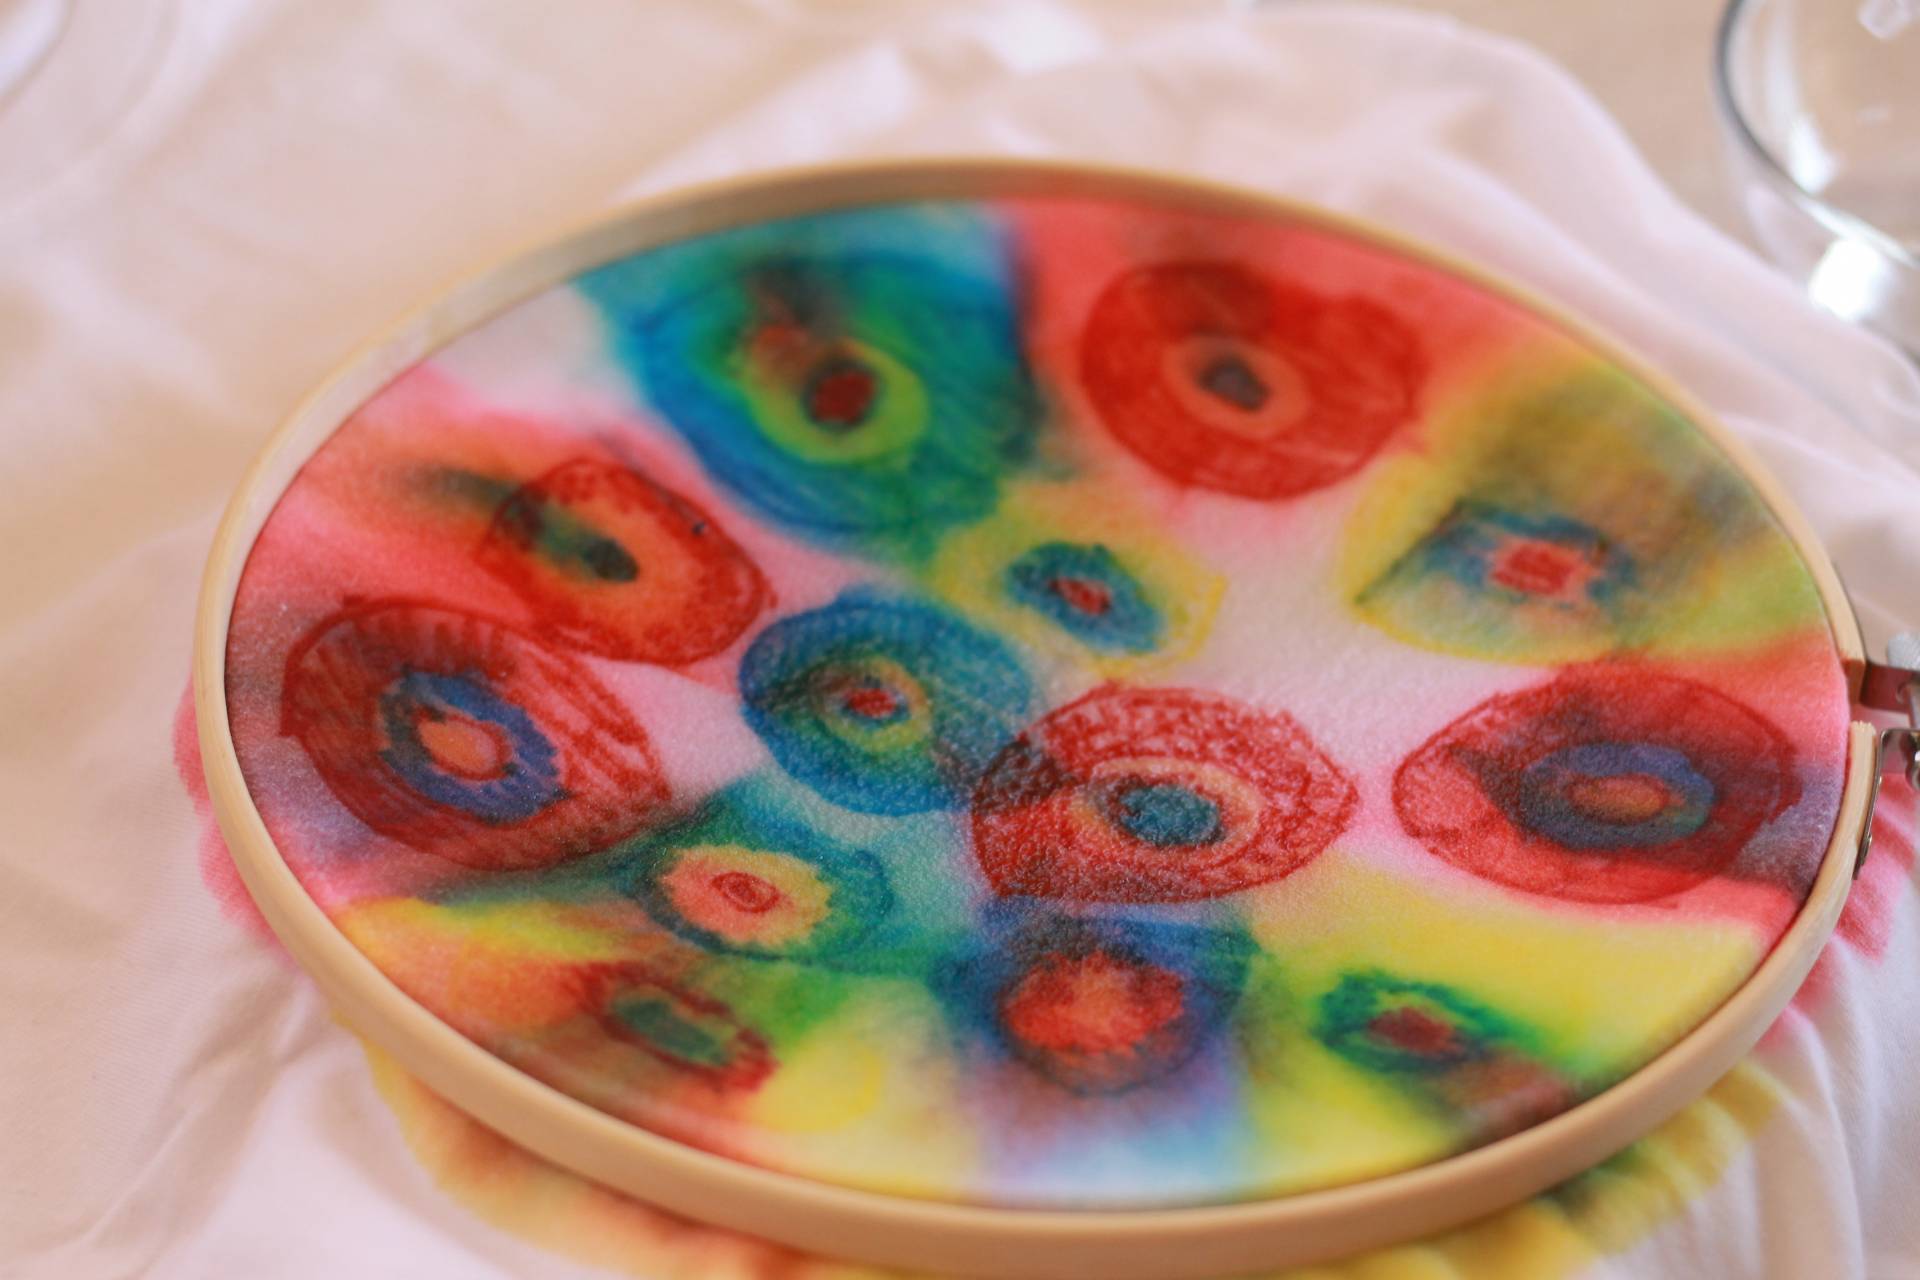
Get that t-shirt really saturated. Alternatively use the rubbing alcohol in a controlled manner to bleed and blend only certain parts of the shirt. Now let dry.
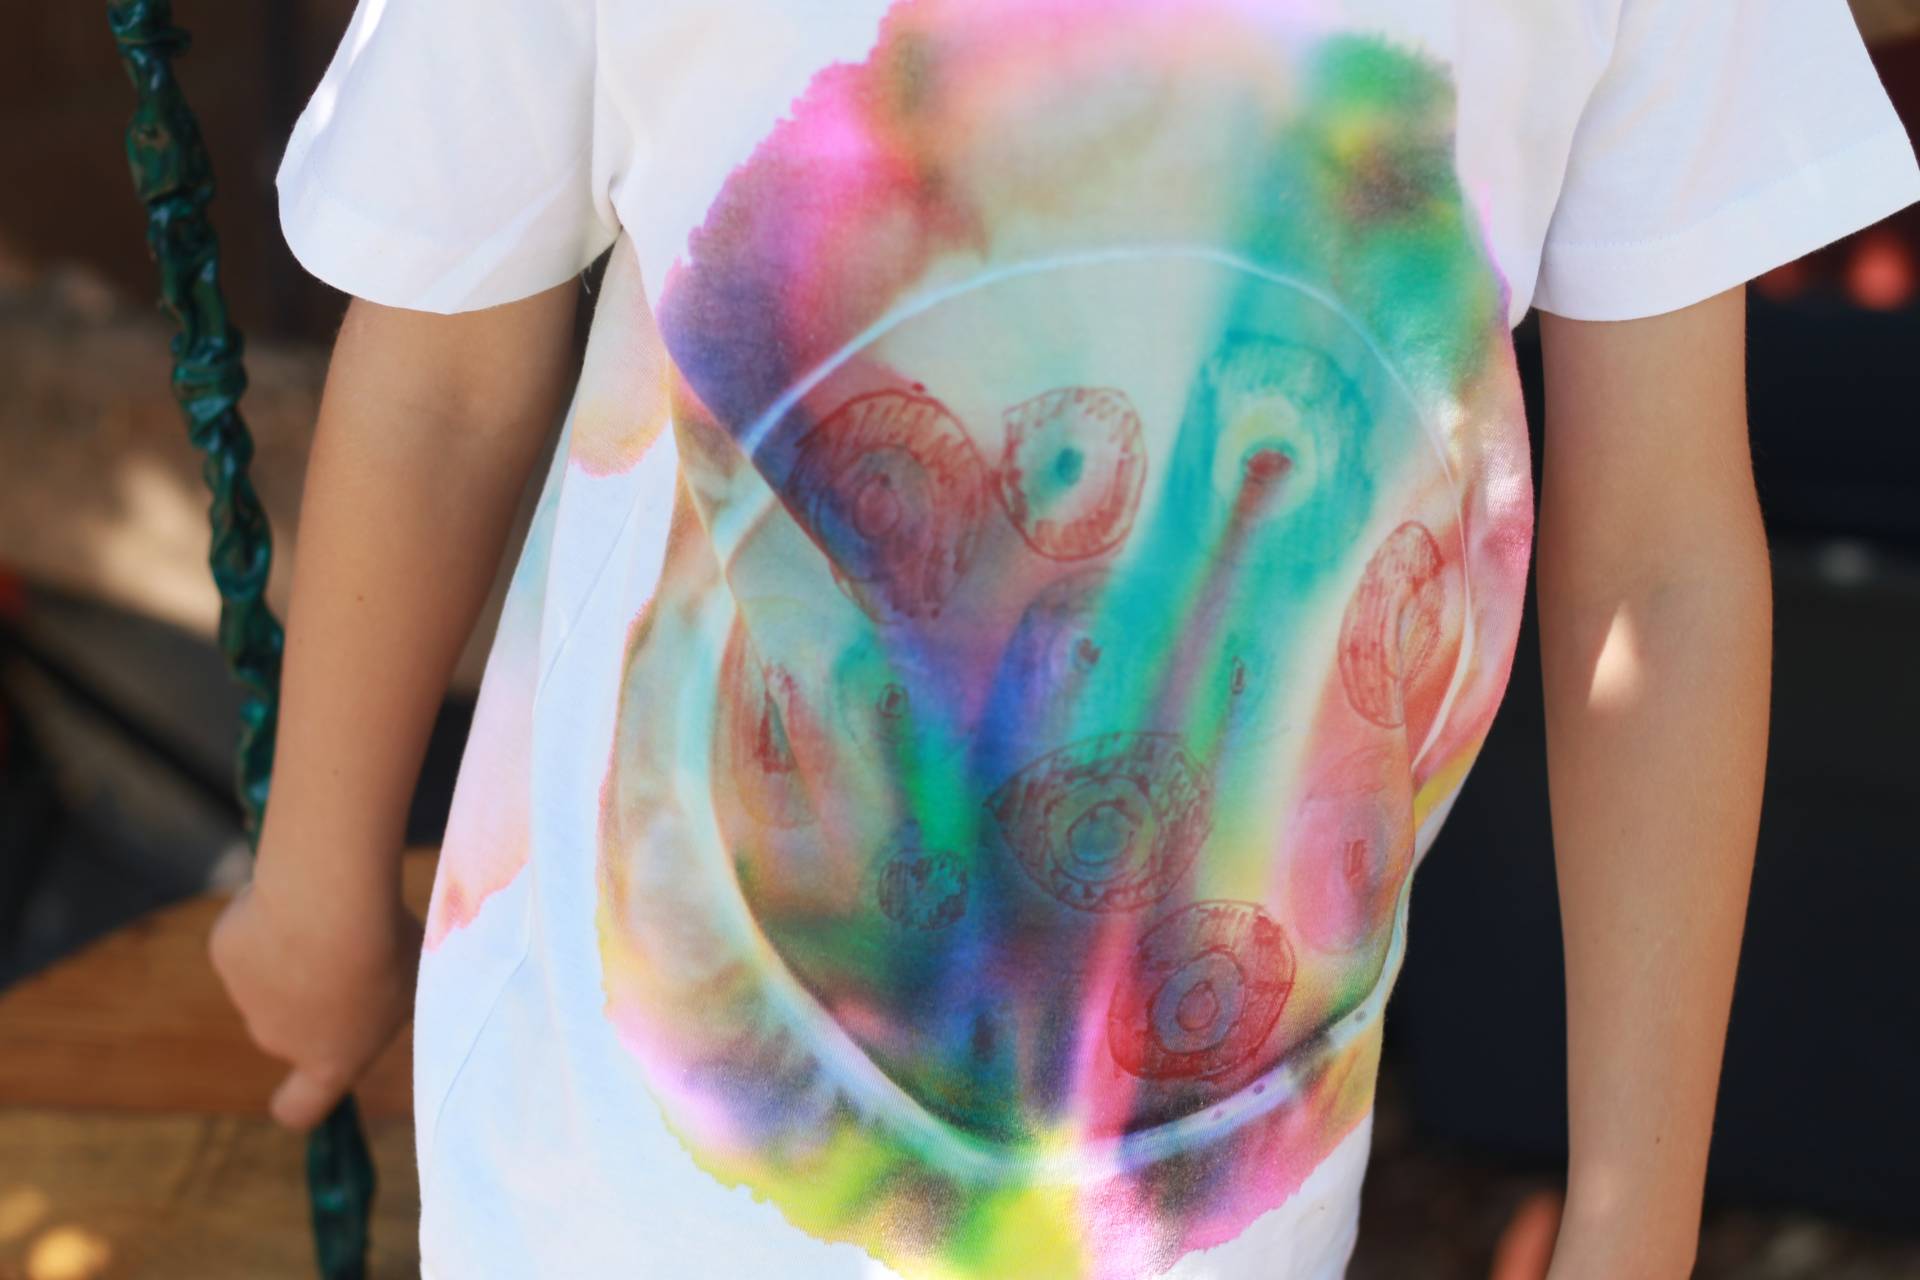
Once it’s dry, remove the embroidery hoop and iron your shirt.
Notes: This will bleed and fade with washing if not treated. If you don’t have an embroidery hoop, stretch the fabric over cups and/or Tupperware and secure it with rubber bands.
While it is tempting to use other colors, using just these three allows secondary colors to appear when they are mixed together. It was another great project to explain what colors are created when “x” and “y” are mixed together!
For more science experiments for kids, please check out our blog!
Now offering 30% your first month of any subscription!
Photographs and content by: Heather Kucenski